Add a Company Property Control to the Document That Reads Medisport Clinic.
Lesson 16: Headers and Footers
/en/word2016/columns/content/
Introduction
The header is a section of the certificate that appears in the summit margin, while the footer is a section of the certificate that appears in the bottom margin. Headers and footers mostly contain additional information such as folio numbers, dates, an author's name, and footnotes, which tin can help go on longer documents organized and make them easier to read. Text entered in the header or footer will appear on each page of the document.
Optional: Download our do certificate.
Spotter the video below to learn more about headers and footers in Word.
To create a header or footer:
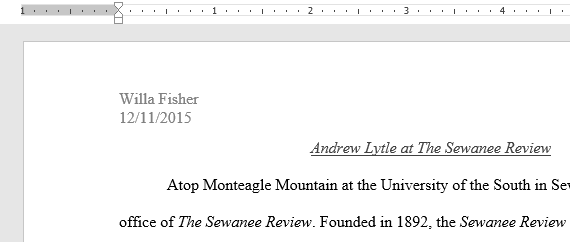
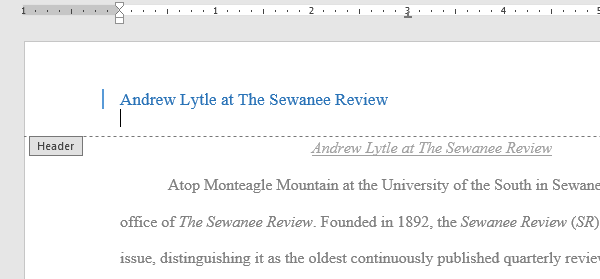
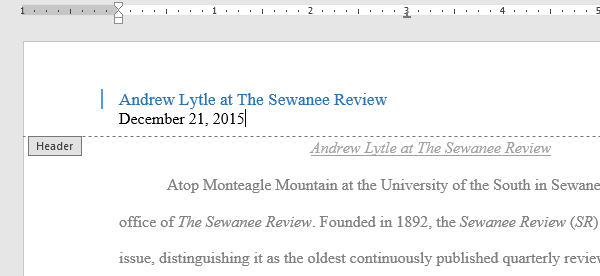
In our case, we want to brandish the author'due south name at the summit of each page, so we'll place information technology in the header.
- Double-click anywhere on the elevation or bottom margin of your document. In our case, we'll double-click the summit margin.
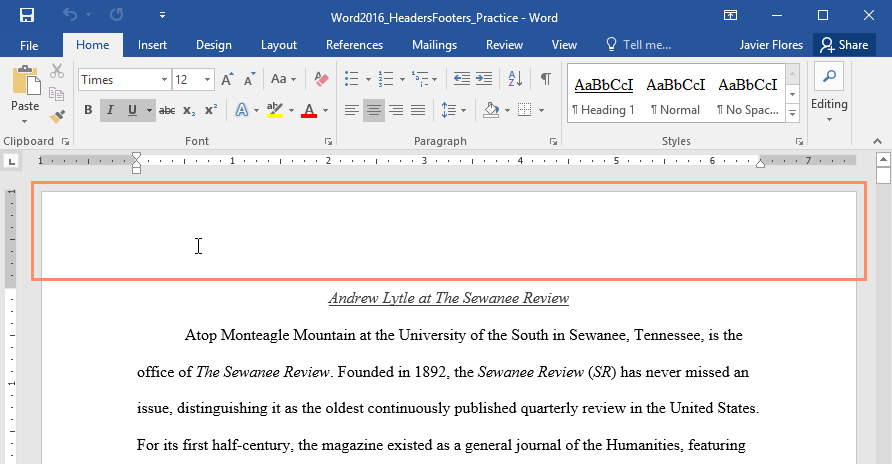
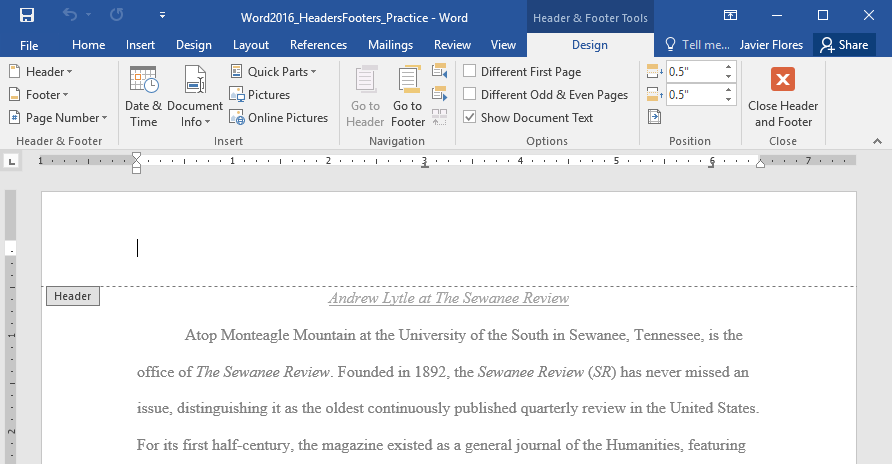
- The header or footer volition open up, and a Blueprint tab will appear on the right side of the Ribbon. The insertion point will appear in the header or footer.
- Type the desired information into the header or footer. In our example, nosotros'll type the author'south name and the engagement.
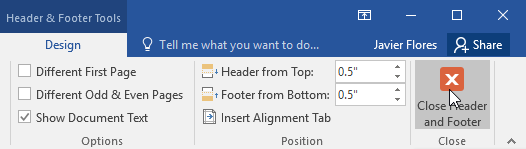
- When yous're finished, click Close Header and Footer. Alternatively, y'all can press the Esc key.
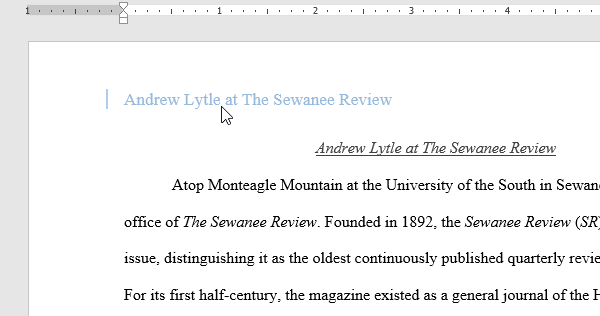
- The header or footer text will appear.
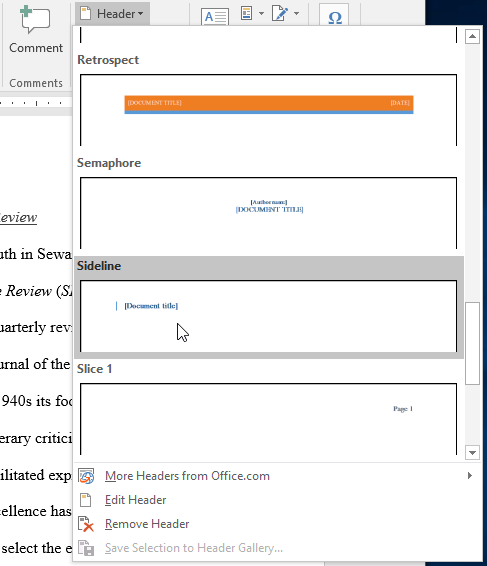
To insert a preset header or footer:
Word has a diversity of preset headers and footers yous can use to enhance your document'south pattern and layout. In our instance, we'll add a preset header to our document.
- Select the Insert tab, then click the Header or Footer command. In our example, nosotros'll click the Header command.

- In the menu that appears, select the desired preset header or footer.
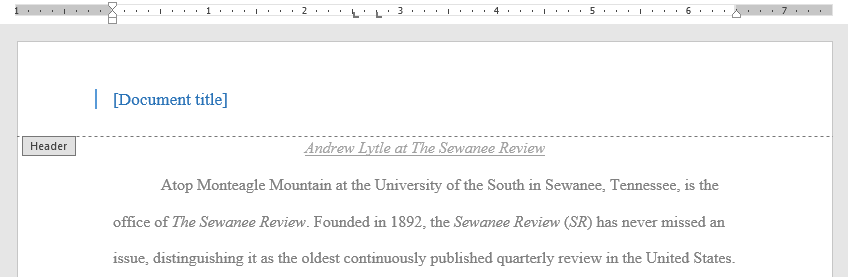
- The header or footer volition announced. Many preset headers and footers contain text placeholders called Content Control fields. These fields are good for adding data like the document championship, author's name, appointment, and page number.
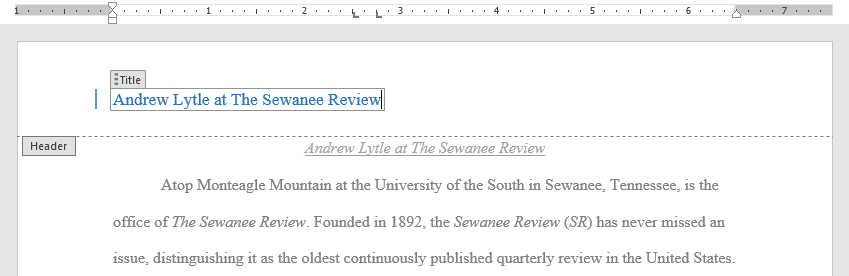
- To edit a Content Control field, click it and blazon the desired data.
- When you lot're finished, click Shut Header and Footer. Alternatively, you can press the Esc fundamental.
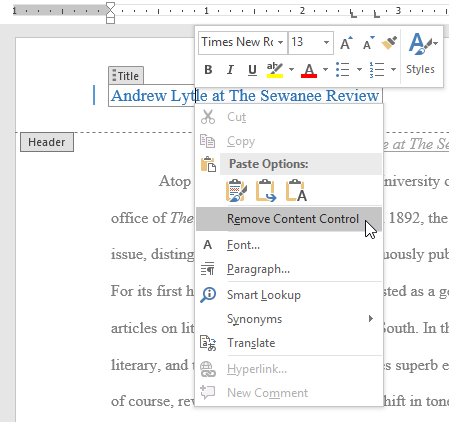
If you want to delete a Content Control field, correct-click it and select Remove Content Control from the carte that appears.
Editing headers and footers
Subsequently you close the header or footer, it volition nevertheless be visible, merely it will be locked. Simply double-click a header or footer to unlock it, which will allow you to edit it.
Design tab options
When your certificate's header and footer are unlocked, the Design tab will appear on the right side of the Ribbon, giving you diverse editing options:
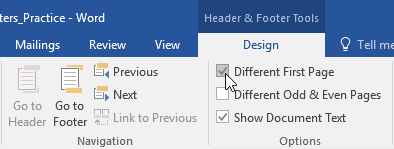
- Hide the showtime-page header and footer: For some documents, you may non want the outset page to show the header and footer, similar if you have a cover page and desire to get-go the folio numbering on the second page. If you desire to hide the first-page header and footer, check the box next to Different First Page.
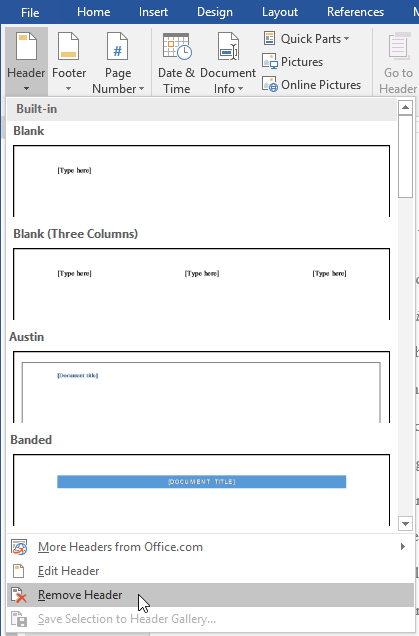
- Remove the header or footer: If you want to remove all information independent in the header, click the Header control and select Remove Header from the menu that appears. Similarly, you tin can remove a footer using the Footer command.
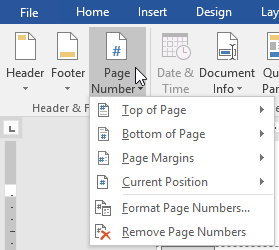
- Page Number: Yous can automatically number each page with the Page Number command. Read our Page Numbers lesson to learn more.
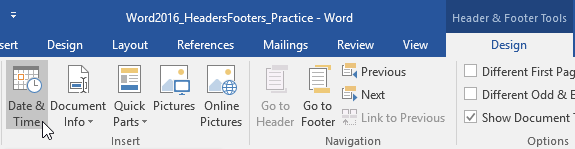
- Additional options: With the commands available in the Insert grouping, yous tin add the date and time, document info, pictures, and more to your header or footer.

To insert the engagement or time into a header or footer:
Sometimes it's helpful to include the date or time in the header or footer. For example, you may want your document to prove the date when it was created.
On the other hand, y'all may want to prove the date when it was printed, which yous can do by setting it to update automatically. This is useful if you frequently update and print a document because y'all'll ever be able to tell which version is the well-nigh recent.
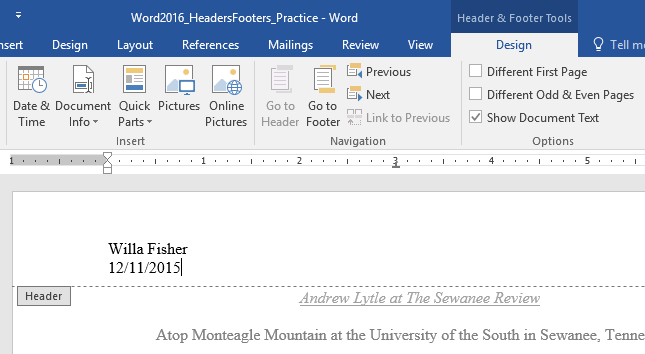
- Double-click anywhere on the header or footer to unlock it. Identify the insertion point where y'all want the engagement or fourth dimension to appear. In our example, we'll place the insertion point on the line below the writer'southward name.
- The Design tab volition appear. Click the Engagement & Time control.
- The Appointment and Time dialog box will appear. Select the desired date or time format.
- Cheque the box next to Update Automatically if you lot want the appointment to change every time y'all open the certificate. If yous don't want the date to modify, leave this option unchecked.
- Click OK.
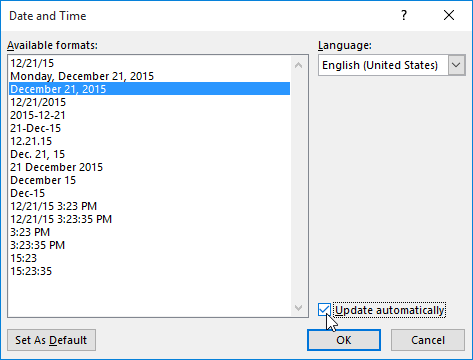
- The date will appear in the header.
Challenge!
- Open our practice document. If y'all've already downloaded our practice document in order to follow forth with the lesson, be certain to download a fresh re-create by clicking the link in this stride.
- Open up the header.
- Choose Marshal Right on the Home tab and type your name.
- Below your name, use the Appointment & Time command on the Design tab and insert the date. You tin can use whichever format you like.
- In the footer section, insert the preset footer Grid. If your version of Word doesn't have a Grid preset, you can cull whatsoever available preset.
- Close the header and footer.
- When you're finished, your folio should await something like this:

/en/word2016/folio-numbers/content/
Source: https://edu.gcfglobal.org/en/word2016/headers-and-footers/1/
0 Response to "Add a Company Property Control to the Document That Reads Medisport Clinic."
Post a Comment